Thursday, May 8, 2014

Gaming on a Budget - Part 2

I opened the Minwax then stuck the minis on the end of my custom drill bit, consisting of blu-tack and washers.  I dipped the Miniatures fully in the minwax and spun then out in a box to get the excess off.


Here is what they look like straight out of the Minwax.  I put a base colored model next to them to show you that the Minwax will change the color slightly of whatever you are putting in it.


So now I have all 4 AT rifles and the scout squad painted and dipped and they are dry and ready for basing.

Using sand that I found in the alley behind my house from all the washouts and rain, I collected it and put it in a container.


Then I cut up a couple old plastic sprue remnants and put them in a cup to use as debris, as this is a Stalingrad based army.


Applying white glue to the bases, I stuck bits of the sprues on the base and I took an old CAT5E cable and used the sheathing to make broken pipe looking debris and took the wire and added it to the bases.


TBC!!!!!

Monday, May 5, 2014

Gaming on a Budget

I created this entry into my Blog mostly to show new people that miniature war gaming does not have to be intimidating nor expensive to get into.


I saw these on sale over Easter at $12.95 a box on Wargames Factory's website.  That's 31 miniatures for $13, quite a steal.


I was not planning on a new army, but my buddy was interested in playing and could not "afford" to play the game.  I picked up two of these boxes to form the core of the forces.

I went to work on Armybuilder (http://www.wolflair.com) and plugged in what I thought I could use out of these two boxes.  I used the Stalingrad Theater Selector and came out with this list:

Battle of Stalingrad August - November 1942 List

Reinforced Platoon, 371 pts
Senior Lieutenant (SMG; Great Patriotic War)
Soldier  (SMG x1; Great Patriotic War)

11 Light Machine Gun Squad (LMG x1; Rifle x10; Great Patriotic War; Team)
1 NCO (SMG)

11 Light Machine Gun Squad (LMG x1; Rifle x10; Great Patriotic War; Team)
1 NCO (SMG)

7 Assault Engineer Squad, 179 pts (Flamethrower x1; SMG x4; Rifle x2; Body Armour; Flamethrower; Great Patriotic War; Team)
1 NCO (SMG; Body Armour)

6 Scout Squad, 119 pts (SMG x6; Behind Enemy Lines; Great Patriotic War; Scouts)
1 NCO (SMG)

11 Free Rifle Squad, 0 pts (Rifle x11; Molotov Cocktails; Great Patriotic War; Green; Tank Hunter)
1 NCO (Rifle; Molotov Cocktails; Tank Hunter)

Sniper Team, 65 pts (Sniper Rifle; Great Patriotic War; Sniper; Team)

Anti-Tank Rifle Team, 39 pts (Anti-Tank Rifle; Great Patriotic War; Team)

Commissar, 15 pts (Pistol; Great Patriotic War; Not One Step Back)

Medic Team, 30 pts (Pistol; Great Patriotic War; Medic)

Total List Cost: 1000
------------------------------------------------------------------------------------------------------------

This used all the models in the boxes save for two, but I needed to get 4 AT Rifle Teams.   I looked at my old standby, www.blacktreedesign.com and picked up a pair of 2 AT Rifle Teams for $6.29 (35% off at the time) for $12.58


So there, I got my entire list bought for a tad under $39.  What a deal.

So after about 5 days, the army arrived at my house.


I got busy assembling the various infantry squads and teams.


I used some green stuff (you can use automotive putty which is way cheaper and you get a ton more) and even sculpted some body armor on the engineer models and I created a custom flamethrower out of a rifle and a pieces of the sprue.  The wire was from a CAT5 cable that was scrap left over at work.


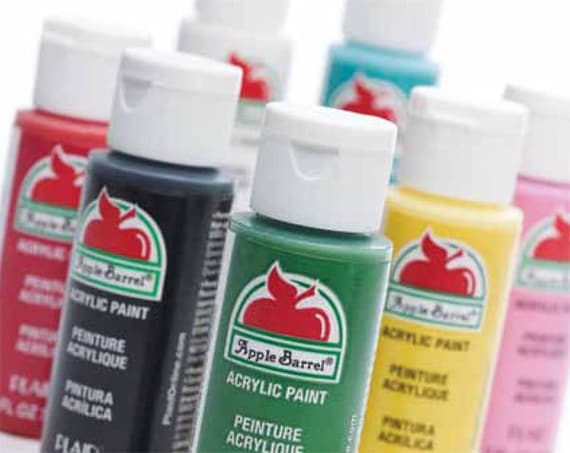
I had a plan at this point to go extremely thifty on this project and bought nothing except Wal-Mart Brand Apple Barrel Acrylic paints and Wal-Mart Daler - Rowney paintbrushes to paint them with.


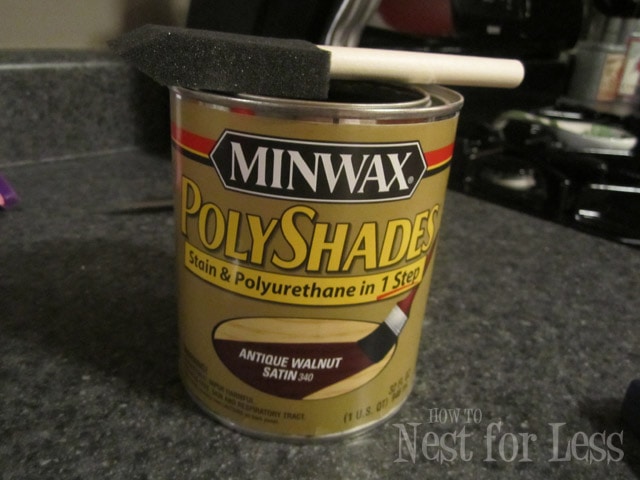
I also picked up a can of Minwax Polyshades Antique Walnut Wood stain to "Dip" the miniatures in when I was done.

Now when using Minwax Antique Walnut, you need to use a shade lighter paint color as it will tend to darken the colors you use for your miniatures.  I chose a light green color called Lime Tree to paint the basic uniform colors for the Soviets. I have painted another set of soviets for a friend using a khaki base, but there are a range of colors for the soviet uniforms, so I went with a green tone on this army.

Here you can see me starting to apply the base color of the uniform to the models.


I have completed base coating all the models in the army with the color, I have started to focus on the veteran scout squad and apply the jigsaw camo on them.


Here are the same guys 1 color applied to each section.  Basically ready to go into the Minwax.


To be continued!!!!!!

Wednesday, April 2, 2014

Panther G - Repaint

I wanted my Command Tank for the upcoming Tank Battles for Bolt Action to stand out.  Here I am copying a scheme from the Bovington Tank Museum.


Thursday, March 20, 2014

1000pts of my Italian Escalation League

Thought I would share some picts of my Italian Army I am using in my escalation league and explain why I took them at each level and what they do for me.
 At the Core of my force, I have my Regular 2nd Lt and his escorts.  All of these models are using SMG's as I use them as a small assault force either escorting my Airborne, or protecting a fixed asset like my Elefantino AT Gun.
 Next in my core force, a nice 8 man regular rifle section.  Nothing spectacular, meant to hold a location and most of the time, with the Italian defensive rule,these guys are chilling out in hard cover.
 This is a clone of my first 8 man rifle section.  They allow me to set up nice static rifle positions.  Rarely do these guys move unless to shore up a weak flank.
 My Assault unit, the 7 man all SMG wielding Veteran Airborne unit in their Laffly s20tl french truck!  These guys are nasty.  14 shots and 14 attacks in close combat and they are veteran.  I added the truck for them in the 1000pt bracket to get them into the thick of it without too many losses by shooting them up the board or coming in outflank quickly.
 San Marco Marine Unit.  6 Rifles, and a SMG.  Veteran flanking unit, and all around tough guys to take and hold objectives.
 Solothurn 20mm Anti-Tank Rifle.  This thing is my poor man's second sniper rifle.  It really has only fired once at anything armored, relegated to pinging off veteran troops and adding pins is all this rifle team has done, but done well.
 Elefantino 37mm AT Gun.  This gun is only responsible for a sherman kill and setting another sherman on fire pinning it enough to make it unusable for the rest of the game.  After it's work is done, it become a long range veteran plinking unit for kills and pins.
 This is my Veteran Sniper Team.  They are hot and cold in my games.  Some games, they have a crazy death toll, others they can't kill anything, but are still able to throw out pins.
 Airborne 81mm Medium Mortar Team.  Have yet to field this, but my force has been unable to deal with static weapons, like AT guns and Multi-Launchers, so I needed something to lob shells into them to make them less effective.  I like the Airborne models, so I had to get an airborne mortar!
Breda 12.7mm Medium Machine Gun.  I like MMGs.  I use them extensively to provide long range support for my assault elements.  Can't say enough about them.  4 dice is 4 dice, it's a good deal.
This is my L6/40 Light Tank.  It fills in the armored car slot of my italian forces.  It is a nice secondary tank, with 8+ armor and sporting a Light Autocannon and Coax MMG.  It is however vulnerable to the sides and has a one man turret sometimes causing it to sit and do nothing.. it does have Recce though, which has come in handy.
The M14/41 Italian Medium Tank.  Two Hull mounted MMGs, A Coax MMG, and a Pintle MMG, along with a Light AT Gun.  When not firing at armor (which I have only ever done twice with it) it provides SIXTEEN dice of MMG.  It's more an Anti-Infantry/Pin machine.  three seperate pins with 8, 4 and 4 dice or 16 dice at one target giving them a bad day.  I have lost this tank twice in my league games so far, but it's usually done it's job of shredding infantry.

Monday, November 11, 2013

White Wash Bolt Action Armor Tutorial

White Wash Bolt Action Armor Tutorial


Here is a Warlord Panzer IV ausf. H mit Schurtzen in all it's glory.  I will be walking you step by step on my white wash technique that I have been using.


After spraying the tank with a nice grey primer coat, I used my airbrush to spray a dark grey over the entire tank minus the tracks as much as possible.


Using a brush I like to refer to as "Old Sh*tty."  It's great to always hold onto old brushes that are past their prime for things like this.


Using a small amount of white paint I began stippling the schurtzen and tank with the crappy brush.


Eventually after some time your tank will look like this.


Now I took this piece of foam from a piece of electronic equipment from a shipping container at work and tore a piece of it off.  Using watered down lighter grey I rubbed it into the corner of the foam.


Rub the foam across panels and corners of the tank to give the tank the look like the tank is wearing the white wash off.  Many can stop of this part, seal the entire model, throw some decals on it and call it a day and it will look quite good.


I added some blackened areas with the foam and black paint.  To emphasize a long time in the field, perhaps a survivor of Kursk?


Adding a little bit of brown, I added some pre-mud effects to the tank.  At this point I also sealed the tank once again with a matte sealant.


I use off the shelf wal-mart oil paints to do some rust effects.  Just put a small dab of the oil paint on the tank and rub vertically down with a Q-Tip.


Here I mixed up some "mud" with Drywall joint compound, sand, and some brown paint.


I cut a "Popsicle stick" into a "tool" to apply the mud.


Mud applied to the bottom of the schurzen.


Mud applied to the tank tracks and lower running wheels.  I did not apply to the top as it's covered up by the Schurzen and you would not be able to see it anyways.


Finished shots of the tank.


T-34-85 I did in the past.